


Views: 215 Author: Bohui Electric Publish Time: 2026-07-19 Origin: Site


Content Menu
● What A Junction Box Really Does
● Planning Before You Start Wiring
● Choosing The Right Junction Box Enclosure
>> Indoor, Outdoor, And Industrial Conditions
>> Size, Fill Capacity, And Cable Types
● Tools And Materials You'll Need
● Essential Safety And Preparation
● Step‑By‑Step – How To Wire A Junction Box
>> Step 1 – Mount The Box And Prepare Entries
>> Step 2 – Trim And Strip Conductors
>> Step 3 – Identify And Group Conductors
>> Step 4 – Make The Connections
>> Step 5 – Dress The Wires And Close The Box
● Common Wiring Mistakes And How To Avoid Them
● Junction Boxes In Modern Industrial And Smart Systems
● Practical Wiring Checklist From An Installer's Perspective
>> 1. Can I use the same junction box model indoors and outdoors?
>> 2. How do I know if my junction box is large enough?
>> 3. Do metal junction boxes need to be connected to earth?
>> 4. Which connector type works best inside a junction box?
>> 5. Why is neat wire dressing important inside the box?
Working with junction boxes is one of those tasks that separates quick fixes from truly reliable electrical installations. As a manufacturer of metal junction box enclosures serving power distribution, communication networks, industrial automation, buildings, and new energy systems, I've seen how the quality of the box — and the way it's wired — directly impacts safety, uptime, and maintenance costs over the life of a system. This guide combines hands‑on experience with current best practices so you can wire a junction box that is clean, safe, and easy to inspect and service.
In everyday projects, a junction box is the quiet center of the electrical system where cables meet, circuits branch, and splices are protected. When it is selected correctly and wired with care, it supports stable operation for years; when it is rushed or undersized, it becomes a weak point that can cause failures, nuisance trips, and difficult troubleshooting. From small building retrofits to complex industrial lines, getting the junction box right is a simple way to raise the overall reliability of an installation.
In our own production, we see junction boxes deployed in power distribution cabinets, communication racks, industrial robot cells, smart pump systems, energy storage containers, and vehicle charging modules. Each environment has different demands, but the wiring principles inside the box remain consistent: adequate space, clear grouping of conductors, secure terminations, and accessible, well‑protected splices.
A junction box is more than just a metal or plastic container; it is the controlled environment where conductors are joined, protected, and kept accessible for inspection. Any time a cable is spliced, a circuit is branched, or a loop is created, the connections belong in a properly chosen box, not floating loose behind a wall or panel. The box keeps live parts enclosed, coordinates strain relief, and provides a stable mechanical structure so the wiring can withstand vibration, maintenance, and minor impacts.
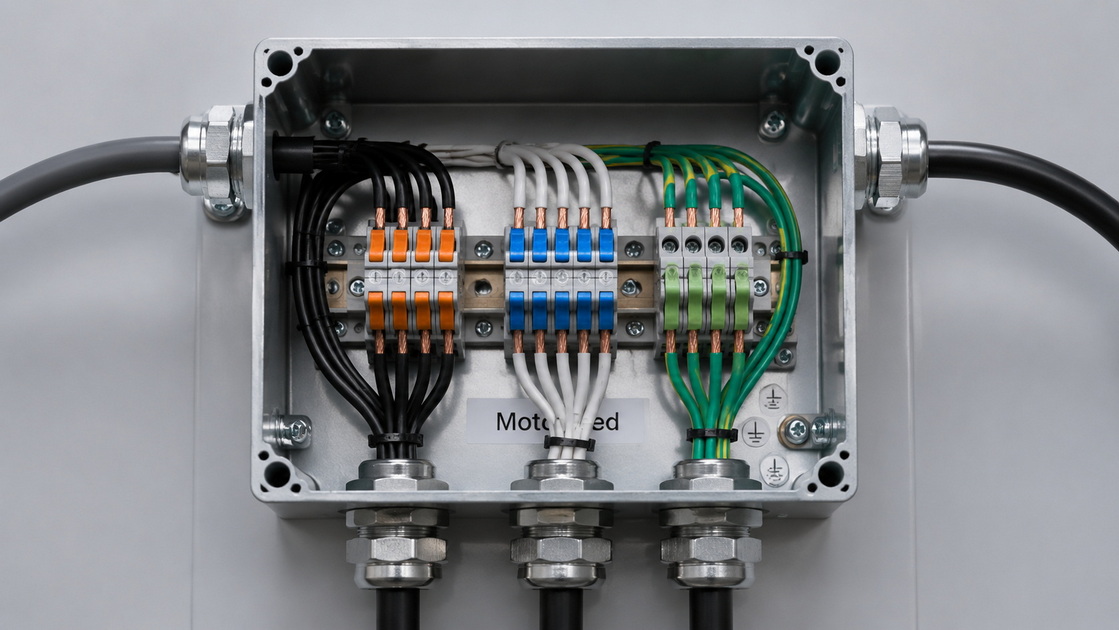
In industrial and infrastructure applications, a well‑wired junction box is also a documentation point. Labels, terminal markings, and consistent wire colors allow technicians to identify circuits quickly. This matters in power‑intensive settings such as pumps, compressors, conveyors, EV chargers, and storage systems, where downtime is expensive and technicians must understand the circuit within minutes.
Before any wire is stripped or any connector is tightened, planning the junction box saves time and reduces errors. The most experienced electricians and panel builders rarely start by cutting; they start by asking a few key questions and matching the box to the job.
Key planning questions:
- What is the role of this box: simple splice, branch to multiple loads, or part of a control loop?
- How many cables and conductors will enter the box, and what sizes are they?
- Is the installation indoors, outdoors, or exposed to vibration, dust, or chemicals?
- Are power circuits and control or data lines separated, or combined in one enclosure?
The answers drive choices on box size, material, mounting position, and cable entry. In our own designs, we focus on knockouts, gland compatibility, and clear earthing points precisely because installers face these questions every day. A box that matches the environment and cable count is the foundation of a clean wiring job.
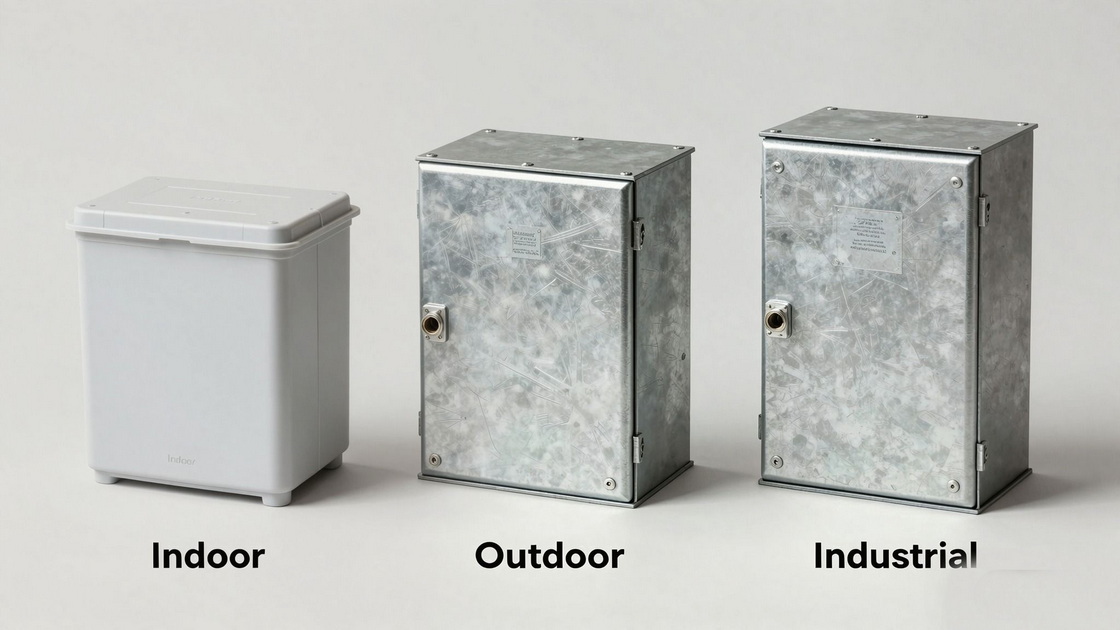
Not every box is suitable for every environment. Matching the enclosure to the conditions is one of the most important decisions you make.
- Dry indoor locations typically use standard surface‑mount or flush‑mount boxes with basic covers.
- Outdoor or wash‑down areas favor weatherproof boxes with gaskets, sealed cable entries, and corrosion‑resistant materials.
- Industrial and smart manufacturing lines often require metal enclosures with reinforced corners, vibration‑resistant mounting, and compatibility with rails, brackets, and accessory hardware.
Metal boxes are common in industrial power and control systems because they offer mechanical strength, shielding, and reliable earthing through the enclosure body. Plastic boxes are more frequent in light domestic work or where weight and corrosion are primary concerns.
Box size is not simply a matter of "whatever fits on the wall." Conductors need enough volume inside the enclosure to avoid overcrowding and heat build‑up. Larger boxes also leave room for future additions and make inspections more comfortable.
A practical approach is:
- Estimate the number of conductors for each cable and their gauge.
- Allow sufficient free space per conductor so there is no crushing or sharp bending.
- Add a margin for connectors, labels, and potential future splices.
In our factory, we see that installers who routinely choose slightly larger boxes enjoy easier commissioning and fewer complaints about cramped wiring. They can dress wires neatly, support connectors correctly, and work without having to force the cover into place.
Having the right tools ready before wiring a junction box creates a smoother workflow and reduces damage to conductors. From both production feedback and field visits, the following list covers the typical essentials:
Common tools:
- Voltage tester
- Screwdrivers (flat‑head and Phillips)
- Wire strippers matched to the conductor sizes
- Side cutters for trimming wires
- Pliers for manipulating clamps and tightening small hardware
- Torque screwdriver or small wrench where specific torque is required
Typical materials:
- Junction box and cover
- Cable glands, bushings, or clamps for each cable entry
- Wire connectors (lever clamps, twist‑on caps, or screw‑type terminal blocks)
- Grounding screws or bars for metal boxes
- Labels, cable markers, or sleeves for circuit identification
From a manufacturer's perspective, designing enclosures that accept standard accessory hardware is critical. When knockouts are well placed and appropriately sized, and when earthing points are clearly marked, installers can complete their work efficiently and consistently.
Safety starts before the first conductor is touched. Professional installers treat every circuit as live until it has been tested and confirmed otherwise. The typical preparation sequence is simple but non‑negotiable.
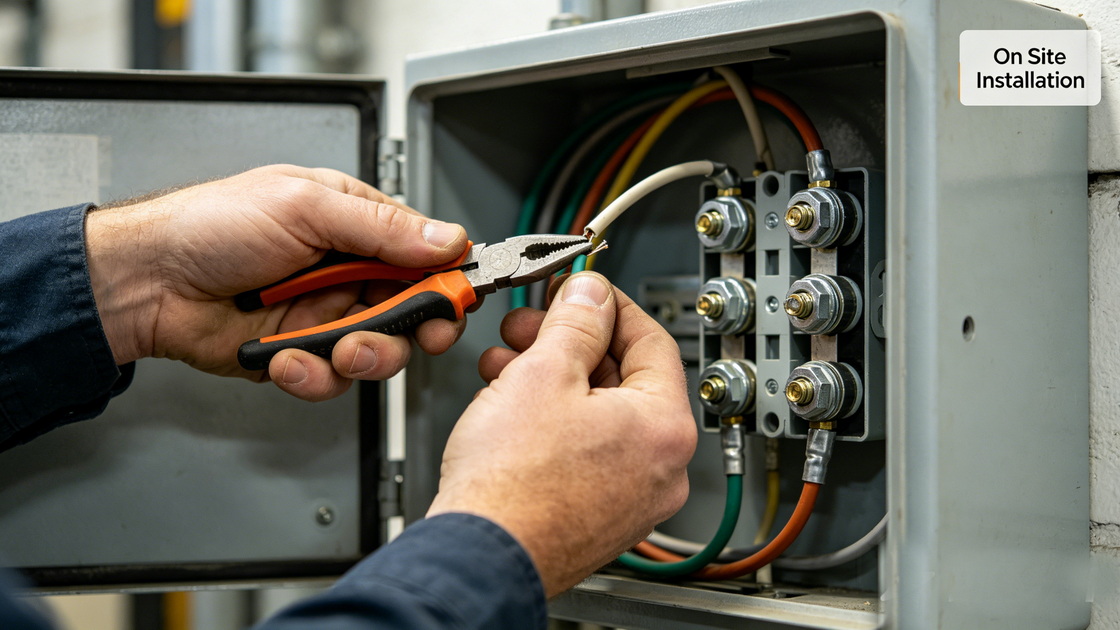
Preparation steps:
1. Isolate the circuit at the breaker, disconnect switch, or main panel.
2. Use a voltage tester to confirm that all conductors in the box area are de‑energized.
3. Check available drawings or labels to identify incoming supply cables and outgoing load or control cables.
4. Inspect cable jackets and visible sections of insulation for damage such as cracks, cuts, or burn marks.
These steps should become a habit. When done consistently, they reduce incidents, protect personnel, and prevent hidden defects from being buried inside a newly wired box.
Start by securing the box firmly to its structure. This could be a wall, a stud, a machine frame, a panel backplate, or a rail system. The mounting should be solid enough to withstand occasional tugging on cables and routine maintenance.
Once mounted:
- Fit cable clamps or glands into the box openings or knockouts.
- Route each cable through its designated entry.
- Ensure that the outer jacket of each cable extends slightly inside the box so clamp pressure falls on the jacket, not bare conductors.
In complex installations, it is helpful to assign entry positions by function: for example, supply cables at the top, load cables at the bottom, and control or signal cables entering from the sides. This simple pattern makes later inspections much clearer.
Inside the box, trim conductors to manageable lengths. A common practice is to leave enough length to reach connectors comfortably and fold the wires back, rather than leaving them tight or excessively long.
Then:
- Strip the insulation from each conductor end using a suitable stripper.
- Keep the stripped length consistent, usually around the length recommended by the connector manufacturer.
- Avoid pulling too hard or nicking the copper, as damaged conductors can fail or heat up under load.
Clean stripping and equal lengths are small details but they distinguish professional work. They also make the interior of the box more organized and improve contact quality in connectors.

Next, identify each conductor by its role and group them logically.
Typical groupings include:
- Line or phase conductors carrying supply voltage.
- Neutral conductors returning current.
- Protective earth or ground conductors bonding exposed metal and completing fault paths.
If the box carries more than one circuit, keep the grouping per circuit consistent. Do not mix neutrals or lines from multiple circuits in ways that make tracing difficult later. Following the project's color code and numbering system is crucial, especially in industrial control and automation panels where many similar cables meet in one place.
With conductors grouped and prepared, you can make the actual connections. Several connector styles are common inside junction boxes:
- Twist‑on caps for splices in building wiring.
- Lever‑type connectors for fast, tool‑less terminations and easy rework.
- Screw‑type terminal blocks for more structured, panel‑style junctions.
Good practice is to:
- Connect earth or ground conductors first, including any bonding conductor that links a metal box body to the grounding system.
- Connect neutral conductors next.
- Connect line or phase conductors last, along with any switched lines or control outputs.
- Gently tug each conductor after securing it to confirm a firm grip and full insertion.
In our collaboration with installers, we see a growing preference for structured terminal blocks and lever connectors in industrial and OEM projects. These solutions allow technicians to replace devices or reroute circuits without cutting back cables repeatedly.
Once all connections are made:
- Fold and route conductors neatly inside the box.
- Avoid sharp bends or compressing connectors against the walls.
- Keep high‑current lines and earth conductors separated from sensitive low‑voltage signal lines as far as practical.
- Confirm that no bare copper or connector edges will be pinched by the cover.
Finally, fit the cover fully and fasten it. The finished box should have all conductors enclosed, cable glands or clamps secured, and no visible strands or insulation trapped in the cover seam. A neat interior makes future inspections and alterations easier, and it reflects the overall discipline applied to the electrical system.
Even experienced technicians can fall into recurring patterns of error when deadlines are tight. Over time, our work with customers has revealed several common mistakes:
- Overfilled boxes: Using a box that is too small for the number of conductors and connectors. This leads to heat build‑up, damaged insulation, and difficulty closing the cover.
- Poor strain relief: Allowing cables to enter the box without proper clamps or glands, which can cause conductors to pull loose when equipment moves or is serviced.
- Mixed circuits: Combining neutrals or line conductors from different circuits without clear logic, making fault tracing and isolation difficult.
- Loose connectors: Failing to fully insert or tighten conductors inside connectors, resulting in intermittent contact, arcing, or leakage currents.
Avoiding these issues is mostly a matter of discipline. Choosing the right box size, installing clamps, sticking to consistent grouping rules, and testing each connection with a gentle pull are habits that pay off over the lifetime of the installation.
The role of junction boxes has expanded in modern systems that combine power, control, and data. In manufacturing lines, pumps, smart buildings, energy storage modules, and vehicle charging infrastructure, the junction box often serves as the physical meeting point for several types of circuits.
Examples include:
- Branching supply feeders to multiple motors or drives.
- Combining sensor and actuator wiring for local control stations.
- Housing local disconnects and test points within complex circuits.
- Providing structured terminations for field cables in modular equipment.
As these applications grow, robust metal enclosures with modular features become increasingly important. Options such as mounting rails, reinforcing ribs, and versatile cable entry patterns allow one box design to serve many use cases. When technicians open such a box, they expect to see not only strong hardware but also clear, well‑organized wiring that matches the system diagram.
Many professionals reduce their junction box work to a repeatable checklist. Adopting a similar routine makes each new installation consistent and easier to audit.
Before wiring:
- Confirm that the box type and size match the environment and conductor count.
- Isolate the circuit and test for absence of voltage.
- Inspect cables for physical damage and confirm their roles in the circuit.
During wiring:
- Trim conductors to practical lengths and strip them carefully.
- Group conductors by function and by circuit.
- Connect earth first, then neutral, then line conductors, and verify each connector.
After wiring:
- Dress wires neatly, avoiding crowding or sharp bends.
- Tighten cable clamps or glands onto the cable jackets.
- Close the cover and perform a final visual check on cable routing and mechanical integrity.
From an installation‑quality standpoint, this simple checklist often makes the difference between a box that passes inspection immediately and one that requires revisiting.
Wiring a junction box may look simple at first glance, but doing it well has a long‑term impact on the reliability and safety of a system. From selecting the right enclosure and planning cable entries, through safety checks, conductor preparation, connection, and neat dressing, every step contributes to a box that can be trusted.
As a manufacturer of junction box enclosures used in power, communication, industrial automation, buildings, and new energy fields, we see how disciplined wiring practices turn solid hardware into durable, dependable junction points. By applying the principles outlined here to your own projects, you create installations that are easier to inspect, simpler to maintain, and better prepared for future expansion.
Generally, no. Indoor boxes are not designed for rain, condensation, or intense sunlight. Outdoor boxes should have appropriate sealing, corrosion‑resistant materials, and suitable cable entry solutions for the environment.
Consider the number and size of the conductors, the connectors you plan to use, and any future additions. If the conductors and connectors feel cramped or the cover is difficult to close without pressing on wires, the box is too small.
Yes. Metal enclosures should be bonded to the protective earth system so that any fault current is safely directed away from users and equipment. A dedicated earth terminal or screw inside the box is normally used for this purpose.
The best connector depends on current, the number of conductors, and maintenance needs. Twist‑on caps, lever connectors, and screw terminal blocks can all be suitable when installed correctly and within their rated limits.
Neatly arranged conductors are less likely to be damaged, make inspection faster, and give technicians a clear view of how circuits are organized. This reduces mistakes during maintenance and upgrades.
1. "How to Install an Electrical Junction Box" – The Spruce. Available at: [https://www.thespruce.com/how-to-install-junction-boxes-1152327]
2. "How to Wire a Junction Box: Step‑By‑Step Safety Guide" – MaidaTech. Available at: [https://maidatechenclosure.com/how-to-wire-a-junction-box/]
3. "How to Mount and Wire a Junction Box" – wikiHow. Available at: [https://www.wikihow.com/Install-a-Junction-Box]
4. "How to Wire an Electrical Junction Box: A Step‑by‑Step Guide" – instructional video. Available at: [https://www.youtube.com/watch?v=x4IZnF3yu80]
5. "How To Wire Junction Boxes" – instructional video. Available at: [https://www.youtube.com/watch?v=14cAySsGBAk]
6. "How to Wire a Junction Box: The Ultimate Guide" – Linkwell Electrics. Available at: [https://linkwellelectrics.com/how-to-wire-a-junction-box/]
7. "5 Mistakes DIYers Make Wiring Junction Boxes" – educational video. Available at: [https://www.youtube.com/watch?v=Sof5OXi0rWI]
8. "How to Wire a Junction Box (Step‑by‑Step Diagram)" – instructional video. Available at: [https://www.youtube.com/watch?v=GBQdxf9Kd9Q]

2026-07-26

2026-07-24


